Showing posts with label paper. Show all posts

Saturday, July 26, 2008

Digital Collage: "Empty"

One digital collage of the 'Journal' series. All the images used are my own photographs: landscape and sky from The Netherlands, seagull from Scotland, window and shutters from France, and the chair was shot in my backyard. The old 1830's paper was folded and scanned.

The weather has changed here in Holland: it is pretty warm, too hot to sit in front on the computer, too hot to do anything except sitting in the shadow and reading a good book!
The ideas for a next collage is already forming in my head, but I am heading for the garden now!

Jane T.: I make these collages in Photoshop. I have been using the program since version 3 so I feel that I know my way around this piece of software. For this collage I used Layers, Layer Modes and Layer Masks only. These features, as far as I know, are also available in Photoshop Elements and Corel PhotoPaint.

Thursday, March 20, 2008

Altering books or creating books?

Altering books is one of my favorite activities. Take an old book, take out the pages and start altering it according to my own theme or style. It is fun to do and I have notices that lately I like to work on this small scale.

But, making books which are adjusted to your own needs (size, thickness, paper etc) is very fulfilling too. Some years ago I did a bookmaking course and so now and then I like to make my own sketchbook or book to be collaged.
See these entries in my blog for some pictures from books that I have made:

These were the first books that I made:
http://exploringart.blogspot.com/2005/10/binded-books.html

This book was made with watercolour paper for the signatures, very stiff paper to fold. But I could work in it with watercolour without the paper wrinkling:
http://exploringart.blogspot.com/2005/10/signs-and-symbols.html
I designed all kind of symbols and painted these in this little book.

Of course I wanted to make some little books as well. All were made with a sewn binding and hard covers. The paper that I use for the signatures was pastepaper:
http://exploringart.blogspot.com/2005/12/three-little-books.html

Another book that I made especially for a Round Robin was also made with pastepaper as signatures:
http://exploringart.blogspot.com/2006/03/new-book-binded-for-next-round-robin.html

These are all books with sewn binding, but on YouTube I found at last a video that explains how to make a book with a coptic binding. Most instructions that I found on the internet were not always easy to understand. I think this is going to be one of my new projects!


Hope you enjoy it!

Sunday, December 16, 2007

Altered Book for Journey RR

We just started a new Altered Book Round Robin on ABEurope. This time the theme is 'journey' . It is a fun theme and one can work it out in so many different ways. I had loads of ideas and settled for a book about a young girl who is dreaming up her journeys to countries and cities around the world to go to see and explore art and architecture.

This is the first time that I sent out a book with the covers not completely finished - but on the other hand, I finished 4 spreads in the book! And I really had to stop myself for doing more, or I would have been much too late.
The book is sent to France, will travel to Germany, England and Norway and then hopefully arrive safely in the Netherlands again!

Friday, July 27, 2007

Stealing time to create

The last weeks are filled with working in my daughter's house: stripping, plastering, sanding, prepping and painting. It seems to take ages, well it is taking ages to get the house done.
It was previously rented to an Afghan family and where they painted the walls blue (or yellow, or red or purple), they also took parts of the ceiling, doorposts, windowframes, central heating etc. with it.
So really most of our time is spent removing paint... And that takes more time than actually painting a room (after stripping the old wallpaper, filling the gaps, sanding and prepping).

Luckily I found some time and inspiration to work on this piece that was hidden in a pile of painted and collaged papers.
I added some Tyvek, ironed some cotton with Wonder Under to it and did some hand stitching.
It is not finished yet - I want to cut out a stamp and stamp over the work as well.
Since I come back home exhausted most of the time, I only get to work at it an hour or so now and then.
Boy, hope that the house get finished soon (but that can take another 3 weeks) and that I can use this summer to create in the garden.... Hmmm, what a wonderful thought!

Thursday, April 12, 2007

New Round Robin on ABEurope group


Front cover

Back cover

This month we will start a new Round Robin on the Yahoo ABEurope group, called 'True Colours'. There was a choice between altered books, tipins and fabric books. I did sign up for the two latter options.
For the tipins I choosed Black&White as colour and 'Typography and ornaments' as a theme. I altered a book by gueing loads of Black and White text and images that fit in the theme, on the covers. In this book I will glue the tipins in. Most of the pages have been cut away, leaving a small stub on which the tipin will be glued.

Sunday, March 18, 2007

Papermaking, part 2


Here are more pictures of my adventures in papermaking (see my previous post). In the picture above you see a little sheet that I pulled after I mixed the red and purple pulp in one vat. The colours did not mix completely, so I got this variegated effect.
When the sheet was still wet, I added the little (normal) pieces of paper. Just pressing them into the sheet was enough to keep them together.

Folding wet sheets after pulling gives a complete different effect than crumpling or folding dry paper. I hope to use pieces of this sheet in textural collages.

Anothere effect that I got after pressing the wooden stamp too hard in a thin sheet: it tore the paper. But I like it - now I have holes to sew unto fabric! I like the very rough edges of this sheet. The stamp was not inked, but it might be the old ink that was still in the wood that left the print.

There is so much what you can do when making your own papers. Here I layed out some fibers on a larger sheet and then couched a smaller page over it. Just a slight pressing and then waiting for it to dry!
I had so much fun trying out these ideas, and I think that I will come up with more ideas the next time...

Saturday, March 10, 2007

Papermaking - just a bit different


As a child I was always attracted to paper. There was some magic in a blank sheet, waiting to be written on, or painted on. No need to say that there is always some special paper in my collection. Often so beautiful, that I hardly dare to use it...
Of course I had to try some workshops papermaking, but did not have the mould and deckle and other tools to really start making it at home.
There are defintely different ways to make paper. In their book: Paper, Metal and Stitch, authors Maggie Grey and Jane Wild show how to use paperpulp in a very creative way. They inspired me to give it a try and explore the possibilities.
The picture above shows the results of wrapping threads around a plastic frame and then weaving through it to make a very, very rough screen. The frame was pulled through the paper pulp and the threads caught the pulp. This frame was then set apart to dry. Only then I cut the threads from the frame. The result is a form of a waffle-like textured paper.

These samples were made by pulling thick papers with a simple mould, made of plastic screen (the one that keeps insects outside). I then stamped an old indian hand carved stamp into the pulp. To keep the texture I did not press these little pages.
I used coloured paper to make the pulp: red and a purple. After working just with the red paper, I poured in some purple pulp. The colours did not mix, so I got a variegated effect! What a bonus!

Normally one would make paper without any holes. I guess, that does not apply to me. After pulling some 'normal' pages, I just went bored and started to make with a small stick and moving the pulp. The result was a pattern with texture as well.

For these samples I teared some wet papers that I had pulled in pieces, and wrapped them partly around a piece of thread.

All these samples will be used up in other projects. Within the next month I will participate in a 'True Colours' Fabric Book RR on the ABEurope Yahoo group. My colours are Red and Purple. So hopefully I can integrate some of these pieces into my book. Can't wait to paint, emboss and embroider them!

Thursday, September 14, 2006

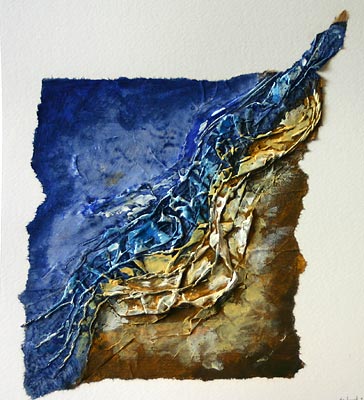
Coast of Bretagne

We spent our one week holiday at the north coast of Bretagne this year and it was marvellous. The coast is very rugged and varied. There were beautiful rock formations everywhere and the influence of the sea so impressive.
I had some watercolour paints with me, but transparant watercolours were not very suitable to try to capture the rugged landscape.
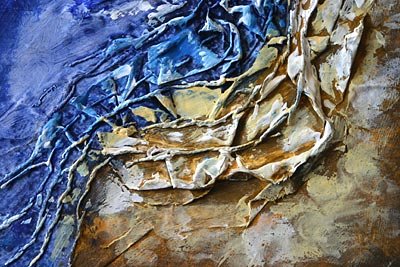
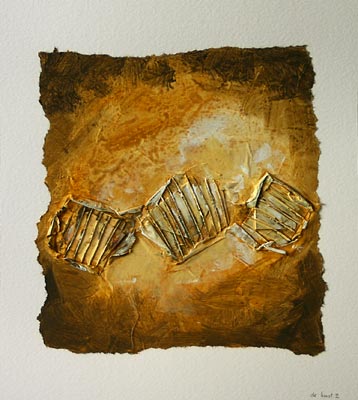
Luckily I just had bought the book: Paper, Metal & Stitch written by Maggie Grey and Jane Wild for me to read on vacation. I found some inspiration in it! The supermarché sold brown kraftpaper, needles and threads. Together with the cardstock wrappings of our groceries, I made several collages.

Detail of the first collage

These materials suited much, much better! At home I added acrylic paint and mounted the collages on thick paper.
Second collage of the series.
Detail of the second collage.